Showing posts with label healthy. Show all posts

Monday, August 13, 2012

taco salad

This is my favorite way of making taco salad,  it has a lot of ingredients but you can adjust everything to your liking


You will need:
1 bag family size nacho cheese Doritos
2 cups of shredded cheese [your choice]
1 large or 2 small cucumbers
2 pounds of ground hamburger [i use ground chuck]
1 can diced chili tomatoes
2 avocados
shredded lettuce
diced tomato
chopped purple onion
4 cans of beans [i used ranch, chili, dark and light kidney.  use whatever you like and however much or less you want]
1 bottle catalina dressing


begin cooking the 2 pounds of hamburger meat in a hot skillet until it has browned


add the can of chili tomatoes after the meat is browned, continue to cook.  i drained the tomatoes before adding them


in the meantime... drain your beans and cut up your vegetables for the salad.  i bought my tomatoes, lettuce and onion already chopped to save some time and trouble.


you can make this salad with whatever ingredients you prefer


............


after the meat and tomatoes have fully cooked and been drained of the grease add both packages of taco seasoning


add water according to taco seasoning packet directions.  simmer until water is cooked out


after water is cooked out add the beans to the meat and continue to cook on low until heated throughout


time to build the salad.  using a large glass bowl begin with chips on the bottom


then add meat and beans..


pour some of the catalina dressing over the meat and chips.. enough to cover it.  [i used two different bowls because this makes a lot of taco salad.  half up your ingredients if you dont have a glass bowl big enough to hold everything at once]


next add about a cup of cheese, save the rest for the top of the salad.  you can use whatever type of cheese you like. I would normally use cheddar but I wanted to try Velveeta pepper jack this time.


more catalina dressing... this stuff makes the salad taste really good.


layer the remaining ingredients on top of the mix.  I put lettuce, tomato, onion, cucumber, avocado and olives.


serve in a glass bowl so that the layers can be seen.  this dish is good hot or cold.  store leftovers covered in the refrigerator.  


^_^


Monday, July 9, 2012

pumpkin fudge brownies

this simple recipe uses canned pumpkin in the place of vegetable oil and eggs for making brownies. you can use low calorie brownie mix and peanut butter to make this even healthier. 
the consistency is fudge-like but soo good!  


you will need:
1 box of brownie mix [your choice!]
2-4 tablespoons of peanut butter [also your choice, i prefer the Peter Pan honey roast creamy]
15-ounces canned pure pumpkin [for some reason i always buy the 20-something ounce can and use about half]


get a large bowl and put the brownie mix in


then the pumpkin...


stir together until blended


pour the mixture into a baking pan, i used an 8x8 glass dish.  use a little butter to grease the inside of the dish to help with sticking.


now the good stuff..


put a few spoonfuls onto the mix, you can do however much you like


swirl it around..  bake in a preheated 350-degree oven for about 30-45 minutes.  i can tell when its done by putting a knife in the middle and it comes out nearly clean.  and the edges start to pull away from the sides of the dish.


i usually let mine chill for at least 1-2 hours before serving. they are even better the next day.


^_^

 store leftovers in refrigerator!

Monday, May 28, 2012

smoked brisket

Hi everyone!  I hope you had a great Memorial Day!  We decided to smoke a brisket at my house.  This is my first attempt at smoking a brisket and just my second time using a smoker. 


to get started you will need: 
a brisket
dry rub seasoning
clear plastic wrap
I also used some salt, pepper and garlic powder


after removing the plastic from the brisket I decided to use mustard to help the seasonings stay on the meat better..


.....


all over on both sides.


I bought McCormick's Grill Mates dry rub for this brisket.  I ended up using the Smokin' Texas flavored packs over the Memphis Pit.  It just tasted better to me.  I used two packages on the brisket.


cover both sides with the seasoning


after you've seasoned the brisket to your liking, wrap it up in clear plastic wrap and set it into your refrigerator to chill.  I chilled this one for 6 hours and let it set out at room temperature for 1 hour before cooking.


you could use whatever wood chips you like, we chose hickory.  you will need to soak these at least one hour prior to cooking.. this is a smaller bag of wood chips and we used them all.


just put them into a large bowl and fill with water, I put a heavy plate on top of these to make sure they were properly soaked.


while the wood chips are soaking and the meat is resting at room temperature now is a good time to get the smoker coals going.. we used about 18lbs of charcoal throughout the entire process.


place coals in bottom of smoker pan and use charcoal starter and light them.. let them rest until they become an even gray color and are glowing hot.. have patience!


we decided to use Mott's apple juice during the first hours of smoking the brisket for the moisture pan.  You can use water here or whatever you want.


This is the unwrapped brisket that has set for about 6-7 hours in the dry rub


after you've got your coals hot and wood chips onto the fire and smoker assembled, its time to put the meat on the grill.. let cook for 6 hours without taking the lid off.


6 hours in..  I flipped the brisket at this point and continued to add apple juice or water into the moisture pan as well as new charcoal to keep the fire going.  


Finally done.. we took it off of the smoker after about 14 hours of slow and low cooking.


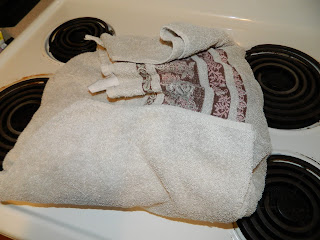
time to let it rest..  wrap the brisket tightly in aluminum foil..


.....


and then into a towel.. place in cooler or refrigerator for at least an hour.  I think I left mine in about 3-4 hours.


looks great!  slice against the grain and your brisket should be tender and flavorful.


yum.   happy memorial day <3


Wednesday, April 25, 2012

tater tot casserole

Tater Tot Casserole.    

This is a versatile dish that is easy to make and is quite tasty.  I've made it many times and have made it many different ways.  I think the way I am about to show you is the best.


I used:

1 bag Ore Ida tater tots
2.25 pounds of ground chuck beef [you dont have to use exactly 2.25 pounds, that's just how its sold at the store I shop at]
some Kraft sharp cheddar cheese [I didn't measure.  See pictures.]
 1 onion
1 can Campbells Cream of Mushroom soup
about 3 tablespoons of Daisy sour cream


First of all, I like to cook the tater tots in the oven before cooking them again in the dish.  This saves time and trouble.  Cook them about 20-25 minutes in a 400 degree oven.


begin to brown your hamburger while the tater tots bake..


 when it begins to brown, stir it up some making sure it cooks evenly.


dice 1 onion by slicing this way


turn it around and slice it this way again


 turn it over and slice again


 yay, diced onion!


add the onion to the meat and let them cook together for a while


add some garlic powder..


and soul food seasoning, i love this stuff!   You can use whatever spices and seasonings you prefer though.


After the meat has finished cooking you should drain it...


for this I just put a plate under my colander 


............


Return the meat and onions to the skillet and turn the heat down to low.  Add the Cream of Mushroom soup...


and about 2-3 tablespoons of sour cream


stir.


let it cook together for a little bit..


tater tots should be golden brown and fully cooked by now...


line some in a baking dish.  


After you've placed the tots, begin to put the meat mixture on top of them..


even it out..


add some cheese!  add however much looks right to you


arrange the remaining tots on top and bake for about 20-30 minutes on around 350. 


after you've baked the casserole for a while and its heated throughout you should add some ketchup on top.  It makes it even better.  I always use Heinz.


ketchupppp.


After you finish putting ketchup on it, turn your oven on broil and put the casserole back in.  Let the ketchup cook a little bit, I usually take it out after the ketchup isn't shiny but isn't burnt.  Up to you, I just like the ketchup cooked.


done!  :D